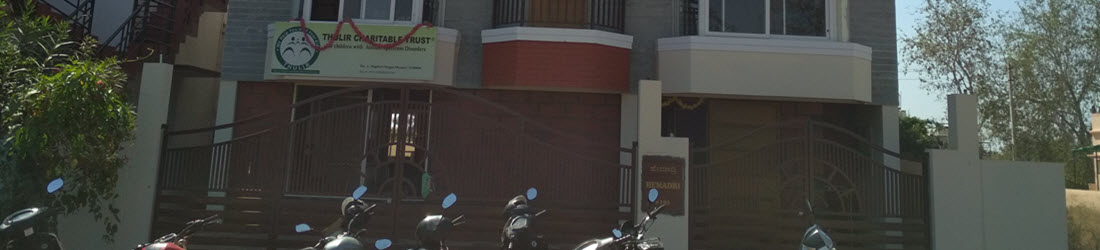
Category: Autism


Autism Kid

  • No babbling by 11 months of age
  • No simple gestures by 12 months (e.g., waving bye-bye)
  • No single words by 16 months
  • No 2-word phrases by 24 months (noun + verb – e.g., “baby sleeping”)
  • No response when name is called, causing concern about hearing
  • Loss of any language or social skills at any age
  • Odd or repetitive ways of moving fingers or hands
  • Oversensitive to certain textures, sounds or lights
  • Lack of interest in toys, or plays with them in an unusual way (e.g., lining up, spinning, opening/closing parts rather than using the toy as a whole)
  • Compulsions or rituals (has to perform activities in a special way or certain sequence; is prone to tantrums if rituals are interrupted)
  • Preoccupations with unusual interests, such as light switches, doors, fans, wheels
  • Unusual fears
  • Rarely makes eye contact when interacting with people
  • Does not play peek-a-boo
  • Doesn’t point to show things he/she is interested in
  • Rarely smiles socially
  • More interested in looking at objects than at people’s faces
  • Prefers to play alone
  • Doesn’t make attempts to get parent’s attention; doesn’t follow/look when someone is pointing at something
  • Seems to be “in his/her own world”
  • Doesn’t respond to parent’s attempts to play, even if relaxed
  • Avoids or ignores other children when they approach

How a Speech Therapist Can Help

The Speech Therapist will assess the child’s speech, language and communication skills and provide services to effect significant changes within the following areas:

  • Speech – articulation and intelligibility of speech
  • Language skills – the understanding and use of language (also known as receptive/comprehension and expressive skills)
  • Communication skills – requesting skills, commenting, conversational skills, etc.
  • The social use of language – pragmatic language skills
  • Reading skills – the ability to decode words and read with meaning/comprehension
  • Written language skills – the ability to write for a variety of purposes
  • Vocal quality – the rate, rhythm, and speaking style
  • Augmentative and alternative communication (AAC) – sign language, Picture Exchange Communication System, voice-output devices such as GoTalk or iPad/iPhone with Proloquo2go.

Therapy sessions can be individual, or can take place in a small or large group settings.

It is so important to keep in mind that no one person with Autism is the same. Each person is unique in their strengths and areas of difficulty and there is a wide range of levels of impairment. Many children with Autism are quite intelligent and can be successful and competent adults.

This blog post is written by
Jasmine Mallik
Speech Language Pathologist


Tactile defensiveness is the most common sensory modulation deficit of tactile system and it is predominantly found in children with autism. Children with tactile defensiveness tend to react negatively to touch sensation that is considered otherwise non-noxious by most typical children. Most commonly it is the hyper-responsiveness to light or unexpected touch.

A child with tactile defensiveness may

  • – Dislike changes in temperature such as going in or out of bathing
  • – Dislike going barefoot or taking his/her shoes off
  • – Pull away from light touch
  • – Dislike eating messy foods with his/her hands
  • – Avoid getting his/her hands in finger paint, sand, paste, clay, etc
  • – Dislike having hair washed, teeth brushed or face washed
  • – Prefer to touch rather than be touched
  • – Seem irritated by fuzzy clothing
  • – Have tendency to walk on his/her toes
  • – Choose to weight bear on tip of the fingers
  • – Get irritated when handled by others especially strangers
  • – Resist wearing new clothes
  • – Get irritated by tags on clothing
  • – Prefer to stand at the end of the line to avoid contact with others
  • – Prefers solitary play

Note:  Child should be observed for cluster of behaviors to be identified as having tactile defensiveness. These behaviors alone do not constitute to tactile defensiveness.  Detailed assessments using sensory profiles are important to arrive into a confirmation.

Tactile defensiveness is a problem, in large part, because of the inappropriate behaviors that accompany it. Defensiveness to touch potentially interferes with all occupations and roles. Basic self-care is affected when a child resists to food, clothes, washing hair, cutting nails, etc. Avoiding sand, refusing to walk barefoot on grass and sand affects play and aversive reactions to different textures or touch of other children disrupts class room behaviors in large which would in turn make learning difficult.

Targets for intervention

  •        – Increase ability to maintain optimal level of arousal in the presence of tactile (or any over arousing) input
  •        – Decrease over reaction to tactile input
  •        – Improve emotional and organizational skills
  •        –  Help the child cope with specific environments
  •        – Address fine motor skills

Intervention

          Sensory experiences can be started in each session with vestibular and proprioceptive input which will help the child calm down and feel a sense of control over the environment. It can be continued with deep pressure and gradual exposure to touch, if tolerated, can be given at the end.

Activities that provide the above mentioned sensory experiences include

  •        – Swing that can be used to provide slow and rhythmic movements
  •        – Hanging on to suspended equipments for proprioceptive input
  •        – Enable jumping, bouncing or pulling while on swing
  •        – Burrowing in large pillows and mats for deep pressure
  •        – Rolling large therapy balls over child’s back or legs for providing deep pressure
  •        – Activities that involve pulling or pushing heavy objects that would help in enhanced proprioceptive input
  •        – Pool of balls, beads or beans where the child can submerge and move around to bet enhanced touch input (allow touch input only until it is tolerated)
  •         – Playing with shaving cream, powder, lotion, paint, sand, water, glue, clay etc after providing vestibular,Proprioceptive and deep pressure input will help to decrease over reaction to touch
  •         – Chewy tubes, chewy snacks blowing activities, deep breathing can be encouraged throughout the day.

Guidelines for providing the above mentioned sensory experiences

  •  – Allow children to provide these inputs by themselves so that they have a control over input.
  •  – It is important to experiment different types of input which would be more effective in each child. Few  children might enjoy and prefer deep pressure to heavy joint compression.
  •  – Children find tactile input more tolerable of they are applied in the direction of hair growth.
  •   – Proprioception is generally the most organizing type of sensation. When a child appears to be bothered by tactile sensation substituting proprioception or combining deep pressure with proprioception is often successful.

Modifying the physical and social environment

  •      – Reduce sensory over load in the environment
  •      – Avoid light touch
  •      – Avoid tight clothing
  •      – Lower voice, use natural light
  •      – Respect child’s personal space
  •      – Do not impose
  •      – Allow the child to have a control over the sense he/she receives and expect a response

Video modelling is defined as, “the occurrence of a behavior by an observer that is similar to the behavior shown by a model on a videotape”.

Modelling is regarded as one of the basic learning processes and it is also treated in the science of applied behavior analysis as a procedure for teaching new behaviors and improving already acquired ones. Modelling can be defined as a procedure whereby a sample of a given behavior is presented to an individual and then the behavior of that individual is assessed to determine if he or she engages in a similar behavior. Video is regarded as a novel and expanding technological medium for positive behavioral support. It has considerable potential as an effective and socially acceptable form of support, mainly because it is widely used by typically developing children and adults for leisure, educational and business activities.

In the area of autism, video modelling has concentrated on teaching a variety of different skills and video technology was used for a retrospective analysis for the identification of early symptoms such as sensory-motor and social behaviors, communication and attention in infants who subsequently were diagnosed as having autism.

Advantages of video modelling in Autism

  •   Video models can present a variety of different behaviors in realistic contexts
  • –  Video may be a useful medium for learners who cannot take advantage of print materials or of complex – language repertoires
  • –  Video can efficiently display various examples of stimulus and response situations, taking advantage of the observed attentional skills of children with autism to graphical presentations.
  • –  A video modelling procedure can lead to new intervention strategies in such a way that individuals with – autism could control their severe behavior problems
  • –  Video modelling promotes discrimination training for the target children or their families, by including error models. In this way, not only does training in the correct responses take place, but it is also relatively easy to show which responses are to be avoided. The video medium provides new opportunities for addressing the generalization deficits displayed by children with autism.
  • –  Video modelling serves as an efficient cost-effective tool in the treatment of individuals with autism.  kid watching a video model

Instructions and Guidelines for using Video Modelling procedures

Below is an overview of the general instructions and guidelines that were taken into consideration.

  • –   After a task analysis, each component of a specific task should be videotaped. The number of sequences to be shown needs to be gauged for a particular child experimentally.
  •  –  Preferably one model should be used. Simple behaviors demonstrated by the model should be about 30–40 seconds maximum.
  • –   At the initial stages, the setting viewed in the videotape should be the same as the setting in which the child will demonstrate the imitative behavior. Thereafter, different settings could be used.
  • –   The treatment provider has to be sure that the videotape shows a close-up of the action he or she wants the child to imitate.
  •  –  The child should be allowed to watch each video clip at least once.
  •  –  The child has to be allowed to have at least two or three minutes to demonstrate the modelled behavior. Whether or not the child has imitated the videotaped behavior, the treatment provider could occasionally provide him or her with praise or a small piece of food for behaving well unless disruptive or challenging behaviors are in place.
  •  –  The child should watch the same modelled sequence again if he or she fails to imitate the behaviors; this should be done at least three times.
  •  –  The treatment provider must keep data for every trial and let the child have at least three successful trials before he or she moves to the next video clip.
  • –  Programming for maintenance and generalization of the imitative behavior must take place across settings, stimuli, people and time.

NOTE: In our clinical experience we have used video modelling to teach tooth brushing, colour concepts, using communicative sentences like “no”, “give me”,  etc and we have seen  tremendous and quicker improvements in kids with autism in learning these concepts.


Experts have long said that people with autism are among the most difficult to toilet train because many traditional potty training techniques simply don’t work for them. While I agree that it’s difficult to teach children with autism these skills, it’s not impossible.

You will need at least two solid weeks of time to be home a lot to work on this skill and be able to be committed to working almost solely on toilet training. Then look at the following three months and make sure that no big changes are planned. It should incorporate all the family members in all settings like home , school, therapy centre etc. I’ve seen many families have “false starts” with their toilet training because they didn’t commit enough time when they began. Once you start a program, you’ve got to keep going. If you’re finding it hard (and it is hard) it will only get harder in a year or two.

The following steps and strategies can be used for effective toilet training program:

  1. 1. Set schedule by toilet chart
  2. 2. Increasing fluid intake / extra drinks / hydration
  3. 3. Scheduling toilet training time
  4. 4. Positive reinforcement
  5. 5. Training the skills needed for undressing, dressing, opening and closing tap, flushing, and washing hand.
  6. 6. Bowel training
  7. 7. Introduce a request
  8. 8. Over-correction for accidents
  9. 9. Night time training
  10. 10. Dealing with accidents after training is complete.


 Toilet training steps in detail

 1.      Set schedule by toilet chart

 A toilet chart is used to monitor and/or schedule the toileting program for a child who is yet to be toilet trained. Initially it is meant to evaluate the number of times the child successfully uses the toilet for a bowel and bladder movement and the number of accidents and on a later stage to have to use as a schedule chart for training. A toilet chart must include components such as day, time, number and amount of fluid intake, number of successful bowel and bladder movements in the toilet and number of accidents. If required it can also have a note on how many times the child indicated to use toilet if the child is partially trained. This evaluation using a toilet chart can be made over a period ranging from 2 to 5 days depending upon the variables in each child.

2.      Increasing fluid intake/ extra drink/ hydration

 When the child is under evaluation for toilet routines, it is important to keep the child hydrated by increasing fluid intake so as to provide maximum opportunities to use the toilet. After 2 to 5 days of monitoring, the child must be encouraged to drink water and other drinks at fixed quantity at fixed intervals to enhance a fixed routine in urination. Marking this on the child chart can be helpful to stick on to the schedule perfectly.

3.      Scheduling toilet training timings

 It’s easy to get a toileting routine of a child using a toilet chart that is recorded at the time of evaluation. With this the average duration of when a child passes urine or motion can be noted and a regular timing can be set for a training program. For example if a child passes urine at 7.00 AM followed by 8.15 AM, 10.00 AM & 11.10 AM, the average would be approximately 1.20 hours. The timing can be fixed depending upon the average. At initial stages it is advisable to have a short duration between two trips to toilet to have better success rates. If a 45 minute schedule is set, the child can be given two ounces of water every 30 minutes and can be taken to the toilet at every 45th minute. If the child didn’t urinate, take him/her to the toilet again after few minutes. Keep a note on all successful trips.

4.      Positive reinforcement

 Once a schedule is fixed for training, wait and spend quality time on finding out and fixing the reinforcements. Any behavior is expected to increase if it is reinforced positively and it holds good for toilet training too. So, the next step is to list out all the materials or toys or anything else that would keep the child happy. Select one or two reinforces from the list that are highly motivating to the child and are not always available to the child. Then pair the reinforcers with the toilet and reinforce the child with that for every successful trip to the toilet. For example, if the child likes and has real fun in playing with sand, then take little sand to the toilet and keep it in just before taking the child to the toilet. Once he/she successfully passes urine or motion in the commode, immediately provide the sand for play for some time. This will increase the child’s motivation to have a control over bladder/bowel movement reach the toilet when there’s a need next time. It’s important not to provide the reinforcement when the child didn’t use the toilet and instead reassure that he/she will surely be reinforced for next successful trip.

5.      Training the skills needed for undressing, dressing, opening and closing tap, flushing and washing

 At the initial stages of the program, the child should be preferably dressed with short and loose/elastic easily removable underpants or trousers. This will help in reducing the stress of hard work involved in manipulating clothes inside the toilet which would otherwise make the child demotivated to get into the toilet for training. But a toilet training program is incomplete unless and until the child independently manipulates dress, tap and other things used inside the toilet. Hence, steps like opening and closing doors, switching on and off the lights, dressing and undressing, flushing the toilet, using tap, using soap, washing and wiping self are very important. Though these skills can also be taught other times, it’s essential to make the child perform all these steps inside the toilet during training. This can be started by giving manual guidance or physical prompt gradually fading to verbal commands and simultaneous practice at other times. Parents should also focus on removing the undergarments up to the ankle level at initial stages so that it doesn’t require extra effort to teach later.

6.      Bowel training

 Training bowel control might appear to be little taxing due to its less frequency than a bladder movement and the variations in time as per the changes in the diet. But with proper maintenance of balanced diet and by following few tips, it will be even easier. Bowel training can be done along with bladder training but with a fixed schedule. Initially the child can be doubly reinforced if there is a bowel movement along with urine in the toilet. To make this practically possible, boy children should be made to sit and urinate until they are completely trained for a good bowel control. As a schedule, fixed timings for 2 to 3 times a day can be allotted for passing motion apart from those set for urine. Giving 2 to 3 ounces of lukewarm water just before the schedule would make the trip highly successful. For example, if the child is scheduled for urine at 7.30 Am and 8.30 Am and has breakfast at 8.00 AM, he/she can be given lukewarm water at 8.15 AM and can be made o try for a bowel movement immediately. Positive results should be reinforced and noted.

7.      Introduce a request

 Once the schedule for bowel and bladder training is fixed and there are regular trips with no accidents, it is time to start teaching the child to request for toileting. Here parents should decide what words can be used for indicating bowel and bladder needs. Words that are once selected should be practiced and uniformly used by all those who are involved in potty training. For children who are minimally verbal or non verbal, signs or vocalizations of any preferred syllable can be used. There are few children who can’t use fingers to produce a sign due to lack of fine motor coordination. In that case, a gross sign like touching the underpants or showing flash cards/ symbols can be used. At the beginning, when the child is on schedule prompted by adult, the adult should use these words or signs and make the child repeat them, both when he/she is on the way to the toilet and just before sitting on the commode. Gradually, when focusing on introducing request, the child must be watched for signals of need to use the toilet at those timings on the schedule. Parent can wait for 5 to 10 minutes for a spontaneous request, reinforce if a request is made and take him/her immediately to the toilet. Whereas when the child didn’t want to use toilet, delay the time for few more minutes and then take to toilet as done in the earlier steps. There might be chances when the mother can sense the child’s need to use toilet but the child doesn’t know how to express it. These are times which have high opportunities of learning a request. In such case, mother can minimally prompt a request and reinforce heavily to increase the behavior.

8.     Over correction of accidents

 Accidents that are happening during a training program should not be overlooked. If the child is on scheduled trips and is ready for requesting, then accidents should also be addressed. An over correction procedure involves having the child engage in repeated behavior as a penalty for having displayed an inappropriate action. In toilet training, this is used to correct accidents. An example is, when a child passes urine/motion anywhere outside the toilet, the child is asked to clean the place with a cloth and rinse it inside the toilet near the commode and repeat the procedure for 4 to 5 times. The number of repetition varies in each child depending on the ability to understand consequences. This would help to pair the place of accident and the toilet to make the child understand the concept of toileting in the toilet.  It would also help the child to opt for using the toilet in order to avoid the strain of repeated cleaning or over correction.

9.      Night time training

 A toilet schedule with longer duration than the day time scheduling is used for night time training. Reducing fluid intakes in late evenings, taking the child to toilet before going to bed, waking up the child at the scheduled timings regularly for toileting, rewarding dry morning heavily with reinforces and reassuring the child for any bed wetting beyond these precautions are tips for night time training. When day time training is done bed -wetting will automatically come down in most of the cases. It is important not to scold or punish the child for night wets as it happens without awareness. Gradually the time duration can be increased so that the child gets good control and wakes up from sleep by self to use the toilet.

10.   Dealing with accidents after the training is complete.

 It is mostly unlikely that a child will have accidents after proper training. In some cases, when there is a change in routine, new environment, stressful day, infections, change in climate, etc, the child might have accidents that can be resolved easily in a week or two.  There might be situations when the child purposely does accidents a behavioral manifestation to gain attention or to demand/avoid a material or activity. In such cases, not meeting up the demand of the child and using over-correction principles will help to reduce accidents. It is also important to shape the child towards appropriate or socially acceptable way to request for needs or attention. When the child is exposed to a new environment like shopping mall, a new school or a friend’s house, he/she should be shown where the toilet is located and prompted to ask when needed. It is important to reassure the child that it is not a shame to use the toilet outside the home environment. Parents and other adults can role model by asking others for a toilet in front of the child so that the child will overcome the shyness behind making a request.

NOTE:

Sensory issues hindering toilet training should be addressed right from the beginning of the program so as to account for quicker and efficient training. When the child has tactile defensiveness (avoiding few textures, wetness, etc) he/she might not wish to sit on the commode, or even step into the toilet. In such cases, activities to desensitize and get adapted to toilet environment should be carried out simultaneously. Monitoring and changing the lighting, Smell of the toilet, texture of the door mat/ towel, keeping the toilet dry, pairing the toilet with reinforces, etc., might be required depending on each child’s sensitivity. As mentioned earlier, children with fine motor problems might have difficulty in pointing  or showing signs using fingers, manipulating dresses, tap, door, etc., Which should be trained simultaneously or even before starting the program in order to have the child become completely independent in toileting.


Colour recognition is the ability to identify and name basic colours. Colour recognition is important in recognizing objects around us and it is a precursor to language in the context of naming and using adjectives. Recognizing colours or other general concepts like shapes, numbers, alphabets, etc. develops in a child in the order of sorting / matching, identifying, naming and generalizing, where, in the context of colour concepts,

Matching denotes the ability to match similar coloured objects
Identifying denotes the ability to identify a colour when it is named
Naming denotes the ability to name a colour when asked
Generalizing denotes the ability to understand the similarity of colours in varied objects

Matching:

Initially, in teaching colour concepts, only one or two primary colours must be taught at all levels of matching, identification naming and generalization. To begin with teaching colour concepts, the child is given activities that involve matching. For example, collect objects of similar shape or size but different colours like yellow and red beads or yellow and red coins. Take two cups, one in yellow and one in red. To teach matching, the child is expected to drop the red coin in the red cup and the yellow coin in yellow cup. Encourage positive responses and correct the wrong attempts. Once the child masters this, include more colours like blue, green, black, white etc.

Generally, children tend to easily achieve this level of matching and parents would begin to proceed to next level- identification. But practically, the transition between matching and identification must be including another phase which involves matching of same colour with objects that are varied by size and shape. We, in our centre, took 15 children with varied cognitive abilities to teach colour concepts. Among them, 11 children could do matching of all primary colours efficiently but could not progress directly to identification.

After matching red and yellow coin in red and yellow cup respectively, the children (individually ) were instructed to pick red coin when named and drop in the red cup (this is identification). All of them were able to leave yellow coins and pick up red coin and drop in the red cup. But when red and yellow coins and red and yellow beads were mixed and presented, children were able to pick up red “coins” but not the red “beads” when instructed to pick up red. This implies that children paired the word “red” for only “red coins”. They could match colours for only those objects that are similar in shape or size. So, before moving to identification children must be trained to match colours of both similarly sized or shaped objects and differently sized or shaped objects.

Hence, the steps in matching would be:

1. From a group of red and yellow coins, match only red coins to the red cup
2. From a group of red and yellow coins and red and yellow beads match only red coins and red beads to the red cup
3. From a group of red and yellow coins, red and yellow beads, red and yellow balls, match only red coins, red beads, red balls to the red cup
4. Follow the above steps to all other colours

sorting and matching colours

sorting and matching colours

OLYMPUS DIGITAL CAMERA OLYMPUS DIGITAL CAMERA OLYMPUS DIGITAL CAMERA OLYMPUS DIGITAL CAMERA OLYMPUS DIGITAL CAMERA


Identification:

Once matching is achieved for all basic colours with varieties of objects, identification of colours can be taught. Here children will be presented with objects of varied colours and varied shapes/size and asked to identify the named colours.

Eg. 1. Present yellow bead and red ball and ask the child to pick up red
Eg. 2. Present red ball and yellow block and ask the child to pick up yellow.

Follow the same for all other colours. In identification, parents/teachers must name colours and child must be asked to repeat the naming during identification. This is the precursor of the next level – naming of colours. For example when the parent says “pick up red”, the child must say “red” when picking up red object. Here the child is learning to pair the name of the colour to the object.

Naming:

In this level, the child must be asked to name the colour of the object for example when the parent says “what is the colour of the ball”, the child must say “red”. If this is not achieved, the child must again be taught identification.

Generalization:

This involves naming of colours that are fixed colours of objects. Example generalization involves the understanding that red is common for apple, tomato, pomegranate, blood, rose, etc. in this the child must be asked to list objects that are of red colour, yellow colour and so on.